Créer un CT sous Proxmox
apt-get update && apt-get upgrade -y
apt-get install net-tools curl wget gnupg2
Grafana
Installation
apt-get install -y adduser libfontconfig1
wget https://dl.grafana.com/oss/release/grafana_8.0.2_amd64.deb
dpkg -i grafana_8.0.2_amd64.deb
Redémarrer le service
### NOT starting on installation, please execute the following statements to configure grafana to start automatically using systemd
/bin/systemctl daemon-reload
/bin/systemctl enable grafana-server
### You can start grafana-server by executing
/bin/systemctl start grafana-server
InfluxDB
Installation
Depuis les sources
wget https://dl.influxdata.com/influxdb/releases/influxdb2-2.0.7-amd64.deb
dpkg -i influxdb2-2.0.7-amd64.deb
/bin/systemctl start influxdb
ou
Avec APT
wget -qO- https://repos.influxdata.com/influxdb.key | apt-key add -
echo "deb https://repos.influxdata.com/debian buster stable" | tee /etc/apt/sources.list.d/influxdb.list
apt-get install influxdb2
Telegraf
wget https://dl.influxdata.com/telegraf/releases/telegraf_1.19.0~rc1-1_amd64.deb
dpkg -i telegraf_1.19.0~rc1-1_amd64.deb
/bin/systemctl start telegraf
ou
wget -qO- https://repos.influxdata.com/influxdb.key | apt-key add -
echo "deb https://repos.influxdata.com/debian buster stable" | tee /etc/apt/sources.list.d/influxdb.list
apt-get install influxdb2
Prometheus
Prometheus Download
Prometheus Get Started
Installation
Configuration InfluxDB
http://X.X.X.X:8086

Renseigner les informations d'accès
Fin de la configuration de base > Get Started pour commencer à utiliser
Aller dans Data pour ajouter Telegraf puis dans InfluxDB Output Plugins
Cela permet de générer directement la configuration de Telegraf pour envoyer les données vers InfluxDB 2 dans un nouveau bucket (zone de stockage influxdb 2)
Configuration Telegraf vers InfluxDB 2
/etc/telegraf/telegraf.conf
[[outputs.influxdb_v2]]
## The URLs of the InfluxDB cluster nodes.
##
## Multiple URLs can be specified for a single cluster, only ONE of the
## urls will be written to each interval.
## urls exp: http://127.0.0.1:9999
urls = ["http://127.0.0.1:8086"]

## Token for authentication. - A retrouver dans InfluxDB > Data > Tokens
token = "$TOKEN"

## Organization is the name of the organization you wish to write to; must exist.
organization = "OWF"

## Destination bucket to write into.
bucket = "collect_base"
Créer un CT sous Proxmox
apt-get install net-tools curl wget gnupg2
Grafana
wget https://dl.grafana.com/oss/release/grafana_8.0.2_amd64.deb
dpkg -i grafana_8.0.2_amd64.deb
### NOT starting on installation, please execute the following statements to configure grafana to start automatically using systemd
/bin/systemctl daemon-reload
/bin/systemctl enable grafana-server
### You can start grafana-server by executing
/bin/systemctl start grafana-server
InfluxDB
https://portal.influxdata.com/downloads/
https://docs.influxdata.com/influxdb/v2.0/get-started/
dpkg -i influxdb2-2.0.7-amd64.deb
/bin/systemctl start influxdb
ou
echo "deb https://repos.influxdata.com/debian buster stable" | tee /etc/apt/sources.list.d/influxdb.list
apt-get install influxdb2
Telegraf
https://portal.influxdata.com/downloads/
https://docs.influxdata.com/influxdb/v2.0/write-data/no-code/use-telegraf/auto-config/
https://docs.influxdata.com/influxdb/v2.0/write-data/no-code/use-telegraf/manual-config/
dpkg -i telegraf_1.19.0~rc1-1_amd64.deb
/bin/systemctl start telegraf
ou
echo "deb https://repos.influxdata.com/debian buster stable" | tee /etc/apt/sources.list.d/influxdb.list
apt-get install influxdb2
Prometheus
https://prometheus.io/docs/prometheus/latest/getting_started/
https://prometheus.io/download/
Configuration InfluxDB
http://X.X.X.X:8086
Bienvenue dans InfluxDB 2
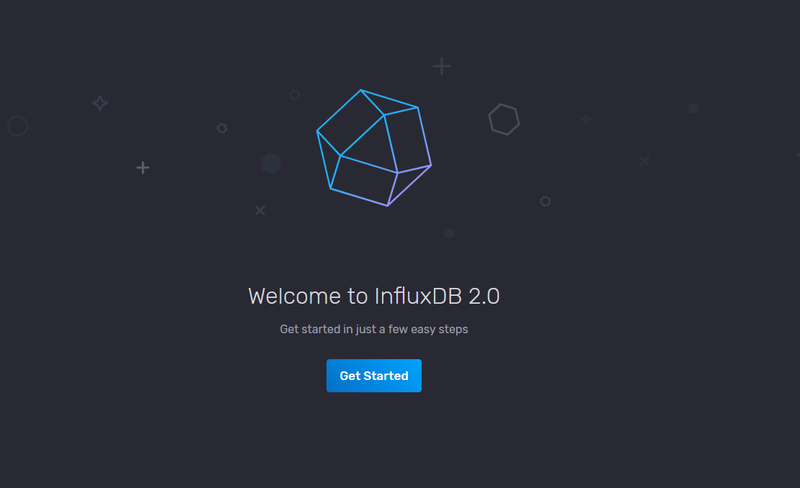
Renseigner les informations d'accès
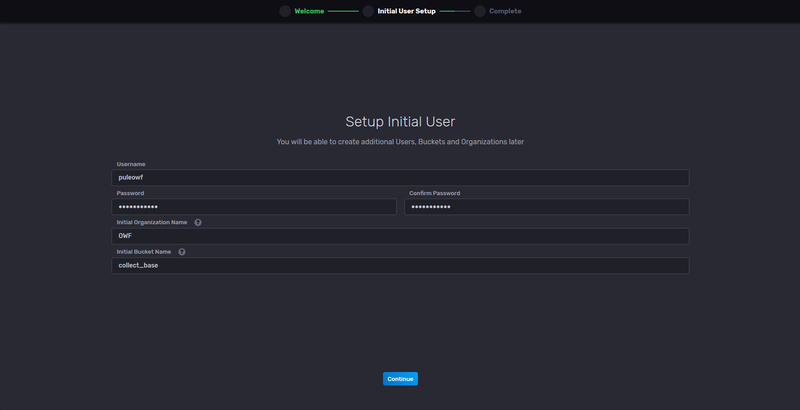
Fin de la configuration de base > Get Started pour commencer à utiliser
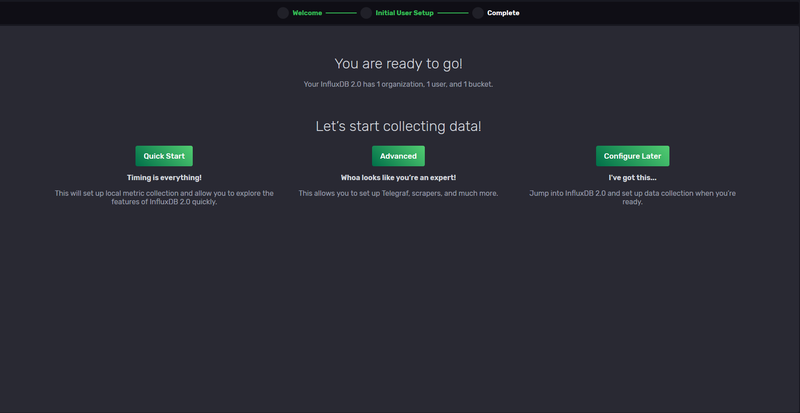
Aller dans Data pour ajouter Telegraf puis dans InfluxDB Output Plugins

Cela permet de générer directement la configuration de Telegraf pour envoyer les données vers InfluxDB 2 dans un nouveau bucket (zone de stockage influxdb 2)
Configuration Telegraf vers InfluxDB 2
/etc/telegraf/telegraf.conf
## The URLs of the InfluxDB cluster nodes.
##
## Multiple URLs can be specified for a single cluster, only ONE of the
## urls will be written to each interval.
## urls exp: http://127.0.0.1:9999
urls = ["http://127.0.0.1:8086"]
## Token for authentication. - A retrouver dans InfluxDB > Data > Tokens
token = "$TOKEN"
## Organization is the name of the organization you wish to write to; must exist.
organization = "OWF"
## Destination bucket to write into.
bucket = "collect_base"